Welcome the Flavors of Decadent Chocolate Mousse Cake Recipe
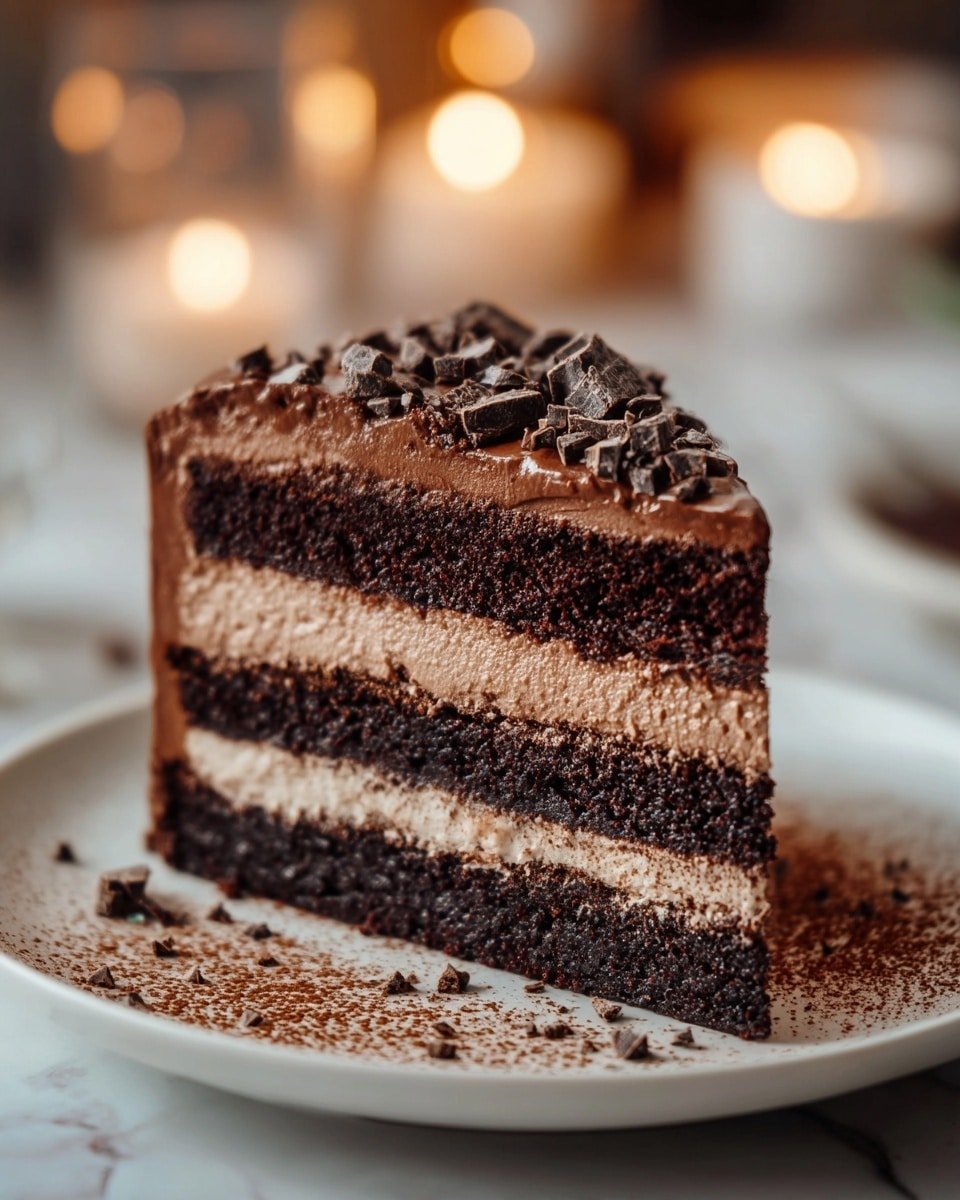
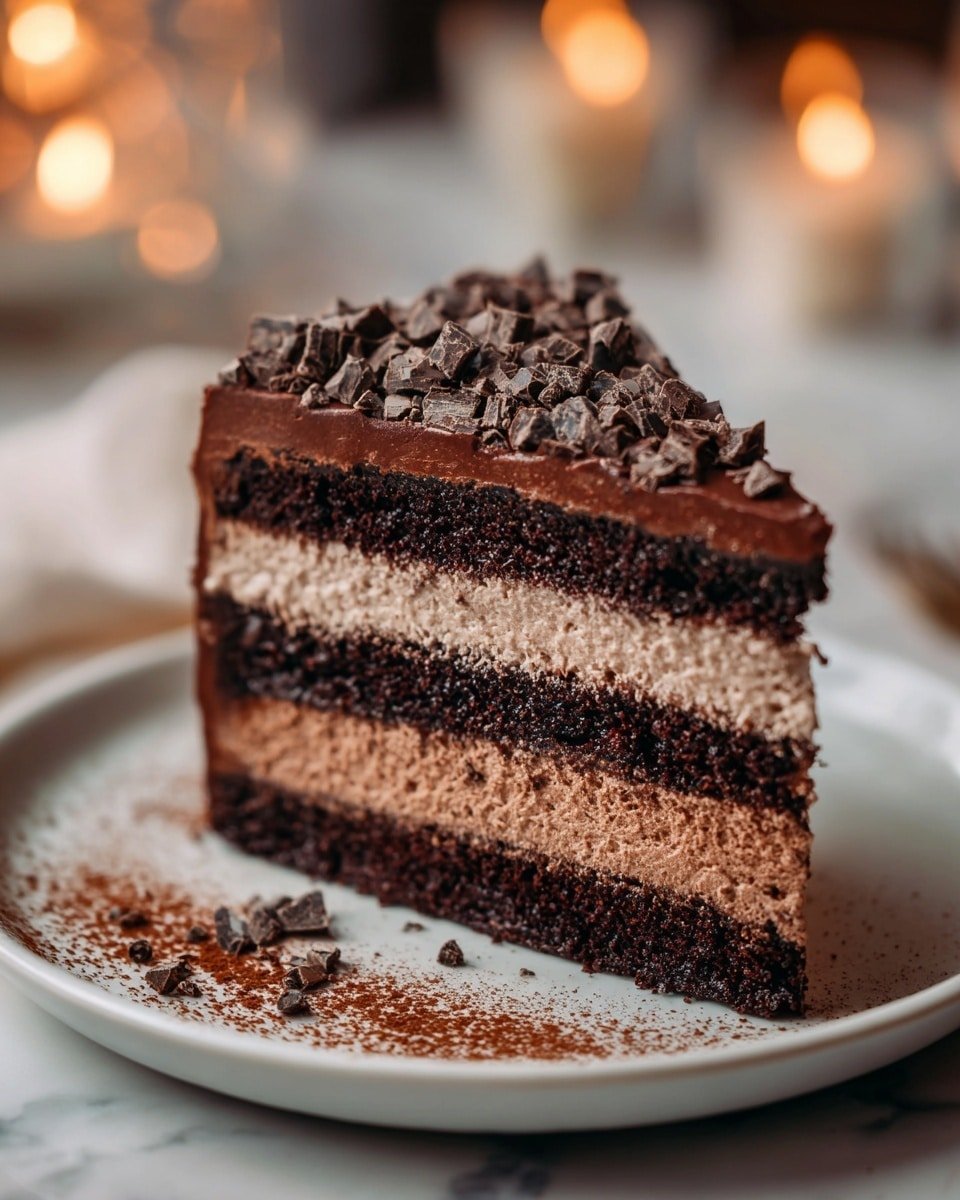
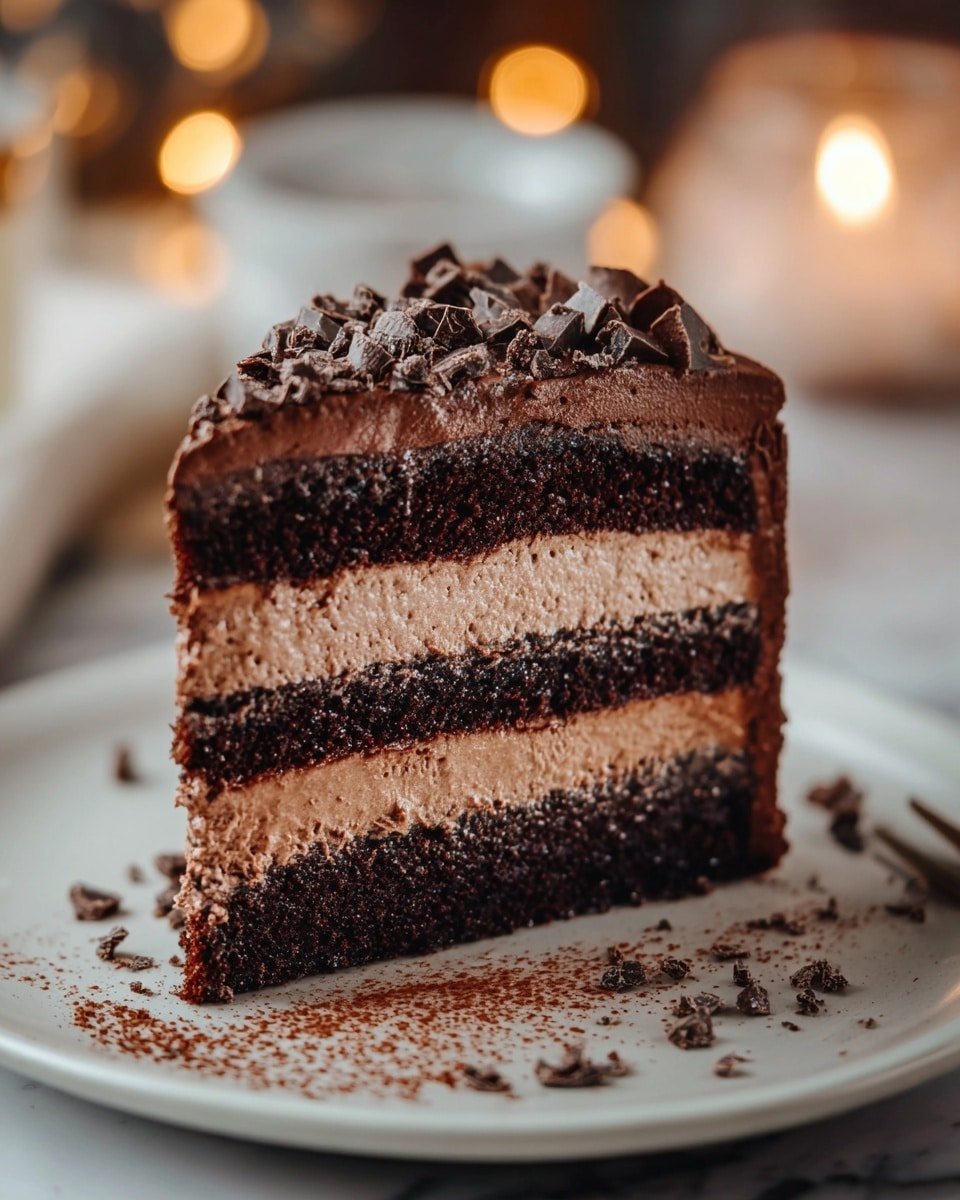
I’ve always adored how a rich chocolate dessert can transform any ordinary day into something special. This Decadent Chocolate Mousse Cake Recipe is one of those divine treats that feels just right for celebrations or a cozy family night in. It’s the kind of cake that invites you to linger over each bubbly, creamy, golden crisp bite with a smile. What I love about this cake is how easy it is to whip up—yet it delivers such an impressive, luscious result. You’ll enjoy the contrast between the light-as-air mousse folded between layers of moist chocolate cake, finished with a delicate cocoa dusting and chocolate curls that feel like a fancy patisserie. Ready to charm your taste buds? Let’s dive in!Daisy’s Top Tips
- Flavor Builder: Add a pinch of espresso powder to the ganache to intensify the chocolate depth.
- Texture Magic: Make sure your heavy cream is very cold for the stiffest peaks and fluffiest mousse.
- Budget Friendly: Use quality chocolate chips instead of fancy bars for terrific flavor without extra cost.
- Time Saver: Bake the cake layers a day ahead to let them cool thoroughly, making slicing easier.
Market Basket & Pantry Picks
- Chocolate Cake Mix (1 box): Look for one with deep cocoa flavor; gluten-free options work great too.
- Heavy Cream (3 cups), divided: Use fresh, full-fat cream for the best volume when whipped.
- Semi-sweet Chocolate Chips (1 cup): Pick your favorite brand, or swap for dark chocolate if you like it extra bold.
- Powdered Sugar (1/2 cup): Ensures silky sweetness in the mousse without grit.
- Vanilla Extract (1 tsp): Pure vanilla adds a warm aroma that brightens the chocolate.
- Cocoa Powder (1/4 cup, optional): Choose natural or Dutch-processed for dusting—it adds a beautiful final touch.
- Chocolate Shavings or Curls (optional): They’re fun to make at home with a vegetable peeler or buy ready-made for decoration.
Smart Shopping Ideas
Always grab heavy cream with the highest fat content you can find—that’s key for that bubbly, airy mousse. When it comes to chocolate, semi-sweet chips are super convenient, but don’t hesitate to pick a bar with your preferred cocoa percentage and chop it up yourself. Fresh vanilla extract makes a world of difference—avoid imitation for the best aroma. For optional garnishes, local bakeries sometimes sell chocolate curls if you want to skip DIY.
Cook Decadent Chocolate Mousse Cake Recipe Step by Step
This recipe invites you to experience chocolate in its most indulgent yet approachable form. Each step offers a satisfying moment—from the fragrant baking to the glossy ganache that feels like velvet on your spatula. Let me walk you through it to ensure your mousse cake comes out as dreamy as mine does at home.- Bake the Chocolate Cake: Preheat your oven and mix the cake batter according to package directions. Spread evenly in a 9×13-inch pan, then bake until a toothpick comes out clean. The warm chocolate aroma will fill your kitchen wonderfully! Let the cake cool completely so it’s easier to slice.
- Slice the Cake Layers: When the cake is cool, I gently remove it from the pan and use a long serrated knife to slice it horizontally into two even layers. If you prefer, you can bake two separate pans to skip this step. Thin layers make the mousse stand out beautifully between them.
- Make Chocolate Ganache Base: Warm 1 cup of heavy cream in a small skillet until it’s just bubbling—don’t let it boil. Pour this hot cream over the chocolate chips in a bowl and let it rest for 2–3 minutes, then stir into a smooth, shiny ganache. Allow this mixture to cool to room temp before folding it into the whipped cream.
- Whip the Cream for Mousse: In a large bowl, combine the remaining 2 cups of heavy cream, powdered sugar, and vanilla extract. Beat on high speed until stiff peaks form; you’ll know you’re there when the cream holds sharp peaks that don’t flop over.
- Fold to Create Mousse: Carefully fold the cooled ganache into the whipped cream using a spatula. The key is gentle, slow incorporation—overmixing will deflate the mousse texture, and nobody wants heavy mousse!
- Assemble the Cake Layers: Place the bottom cake layer on your serving plate. Spread half of your luscious mousse evenly over it, then gently set the top cake layer on. Spread the remainder of mousse across the top and around edges for a luscious finish.
- Garnish & Chill: Lightly dust cocoa powder over the top for an elegant look. Top with chocolate shavings or curls to add flair and texture. Chill the cake for at least two to four hours—overnight is best—to let the mousse firm up into that dreamy, airy delight.
Serving the Dish with Flair
Serve It Up Right
- Perfect Pairings: A scoop of fresh berries or a drizzle of raspberry coulis complements the chocolate beautifully.
- Plating Magic: Use a hot knife to slice the cake cleanly, wiping between cuts for sharp, inviting slices.
- Leftover Love: Wrap leftovers tightly and store in the fridge for up to 4 days. Avoid freezing to keep mousse texture intact.
- Occasion Twist: Add a splash of flavored liqueur like Frangelico or Grand Marnier to the mousse for parties or holidays.
Fun Variations with Decadent Chocolate Mousse Cake Recipe
- Swirl in some caramel or peanut butter before folding the mousse for a nutty surprise.
- Add finely chopped mint leaves or a drop of peppermint extract to the ganache for a festive twist.
- Replace half the semi-sweet chips with white chocolate for a striking contrast.
- Incorporate a layer of crushed cookies or toasted nuts inside for added crunch.
- Mix some espresso powder into the mousse for a mocha kick that’ll wow coffee lovers.
- Top with fresh fruit like sliced strawberries or cherries for a bright pop of color and flavor.
Make-Ahead & Storage Tips
- Refrigerate the assembled cake for at least 4 hours or overnight to let the mousse set perfectly.
- If making ahead, bake and slice the cake layers 1 day in advance, then assemble on the day you plan to serve.
- Store leftovers in an airtight container wrapped with plastic wrap to prevent drying out.
- Avoid freezing the mousse cake as it can separate and lose that irresistible texture.
- To serve, bring refrigerated cake to room temperature for about 15 minutes to soften flavors.
Decadent Chocolate Mousse Cake Recipe FAQs
- Can I use homemade chocolate cake instead of box mix? Absolutely! A homemade chocolate cake works beautifully and adds your personal touch.
- What if I don’t have a serrated knife to slice layers? Use dental floss or a long piece of thread tautly pulled across for a clean cut without crumbs.
- Can I make this cake dairy-free? For a dairy-free version, use coconut cream and dairy-free chocolate chips, but note the texture may alter slightly.
- How long will the mousse stay stable after chilling? The mousse is best within 1-2 days refrigerated, as it might start to soften after that.
- Can I decorate the cake differently? You can try fresh berries, edible flowers, or a drizzle of chocolate ganache for a fancy finish.
Decadent Chocolate Mousse Cake Recipe
This Decadent Chocolate Mousse Cake features a rich chocolate cake layered with a smooth, airy chocolate mousse made from whipped cream and silky ganache. With its luscious texture and elegant presentation, this recipe is perfect for special occasions or anytime you crave a sophisticated chocolate dessert.
- Prep Time: 20 minutes
- Cook Time: 30 minutes
- Total Time: 4 hours 50 minutes
- Yield: 12 servings
- Category: Dessert
- Method: Baking
- Cuisine: American
Ingredients
Cake
- 1 box chocolate cake mix (for a Chocolate 9×13 Cake)
- Ingredients required as per cake mix box instructions (typically eggs, oil, water)
Mousse
- 3 cups heavy cream, divided
- 1 cup semi-sweet chocolate chips
- 1/2 cup powdered sugar
- 1 teaspoon vanilla extract
Garnish (Optional)
- 1/4 cup cocoa powder (optional for garnish)
- Chocolate shavings or curls for decoration (optional)
Instructions
- Bake the Chocolate Cake: Prepare the chocolate cake mix according to the package directions and bake it in a 9×13-inch pan. Once baked, allow the cake to cool completely. Then, carefully remove the cake from the pan and slice it horizontally in half with a serrated knife to create two thin, even layers. Alternatively, bake in two pans.
- Make the Chocolate Ganache Base for Mousse: Heat 1 cup of heavy cream in a small saucepan over medium heat until it begins to simmer, making sure it does not boil. Remove from heat and pour the hot cream over the semi-sweet chocolate chips in a bowl. Let it sit undisturbed for 2–3 minutes to melt the chocolate. Stir everything until smooth and glossy, then let the ganache cool to room temperature.
- Whip the Cream for Mousse: In a large mixing bowl, combine the remaining 2 cups heavy cream, powdered sugar, and vanilla extract. Using an electric mixer on high speed, whip the mixture until stiff peaks form, ensuring a light and airy texture.
- Fold and Create the Mousse: Gently fold the cooled chocolate ganache into the whipped cream using a spatula. Incorporate the two mixtures until fully combined, being careful not to overmix to maintain the mousse’s fluffy consistency.
- Assemble the Layers: Place the bottom cake layer on a serving plate or cake board. Spread half of the chocolate mousse evenly over this layer. Position the second cake layer on top, then spread the remaining mousse over the top and around the sides, smoothing it for a polished finish.
- Garnish and Chill: Lightly dust the top of the cake with cocoa powder if desired. Decorate with chocolate shavings or curls for an elegant touch. Refrigerate the cake for at least 2 to 4 hours, or preferably overnight, to allow the mousse to set properly before serving.
Notes
- For best results, ensure the cake is completely cooled before slicing and assembling to prevent the mousse from melting.
- Use high-quality semi-sweet chocolate chips for a richer flavor in the mousse.
- Be careful not to overmix when folding the ganache into the whipped cream to keep the mousse light.
- The cake can be made a day ahead; just keep it refrigerated until serving.
- Optional garnishes like cocoa powder and chocolate curls add a beautiful finishing touch but can be omitted if desired.

