Welcome the Flavors of Easy Baked Salmon Sushi Cups Recipe
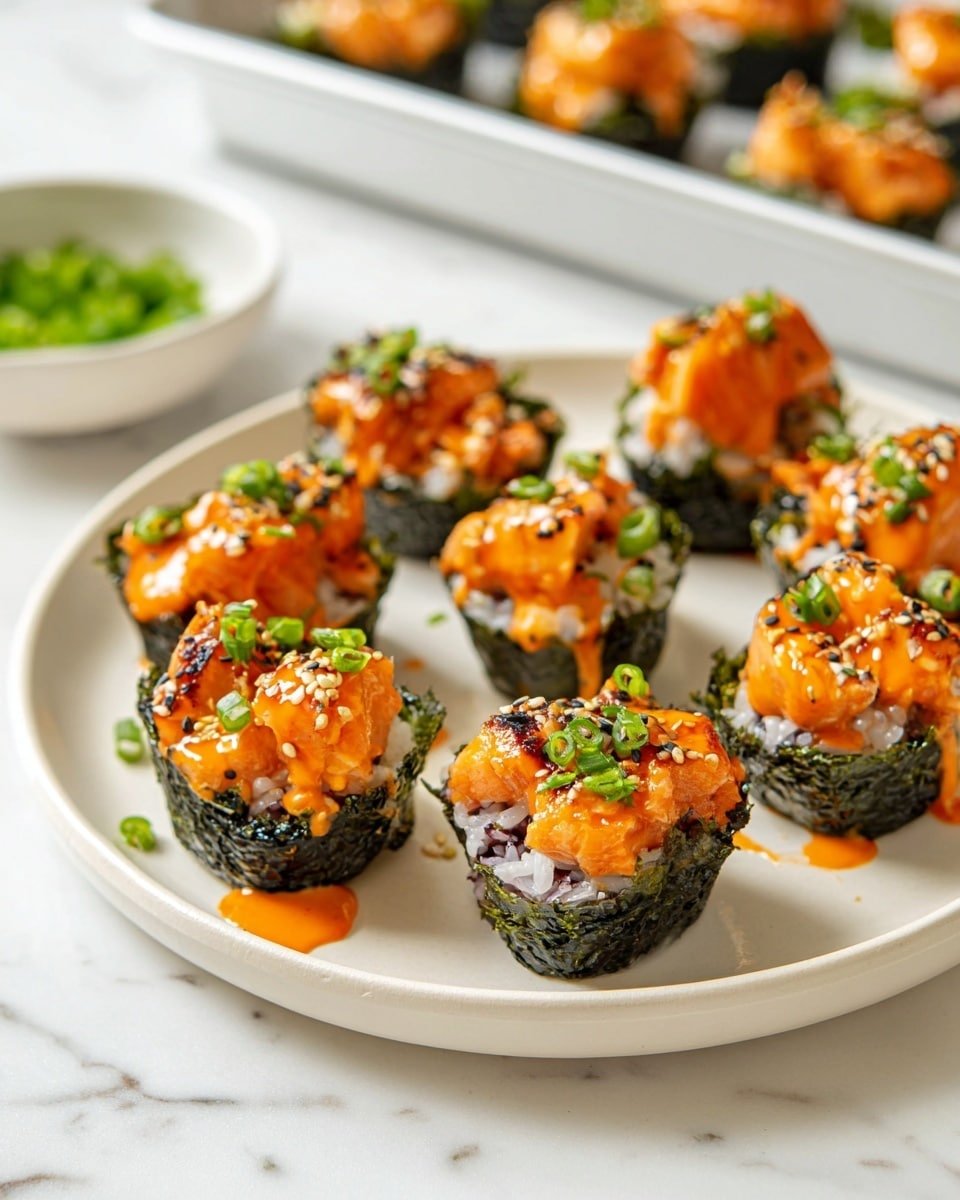
I just love how the Easy Baked Salmon Sushi Cups Recipe brings a fun twist to classic sushi — all the vibrant flavors packed into handy little bites. Whether you’re looking for a creative weeknight dinner or planning a casual gathering, these bubbly, golden crisp sushi cups never disappoint. They’re perfect for when you want something flavorful but fuss-free. You’ll enjoy how the tender, savory salmon blends beautifully with the vinegared sushi rice and that subtle kick of sriracha mayo. Plus, baking them means you get a lovely warm dish, which feels comforting without losing any of sushi’s signature freshness. I often make these when I want something a little different but still quick to whip up! This recipe is a crowd-pleaser that’s super approachable, even if you’re new to sushi-making. Let’s dive into the delicious details and get you set up for success with my favorite tips right afterward.Daisy’s Top Tips
- Flavor Builder: Marinate your salmon cubes in soy sauce and sesame oil for at least 10 minutes to deepen their savory notes.
- Texture Magic: Press the sushi rice firmly but gently into the nori—this keeps the cups sturdy without smashing the grains.
- Budget Friendly: Swap fresh salmon for frozen fillets when on a budget; just thaw properly before using.
- Time Saver: Use leftover cooked sushi rice or pre-cooked rice from your meal prep stash to cut down on active time.
Market Basket & Pantry Picks
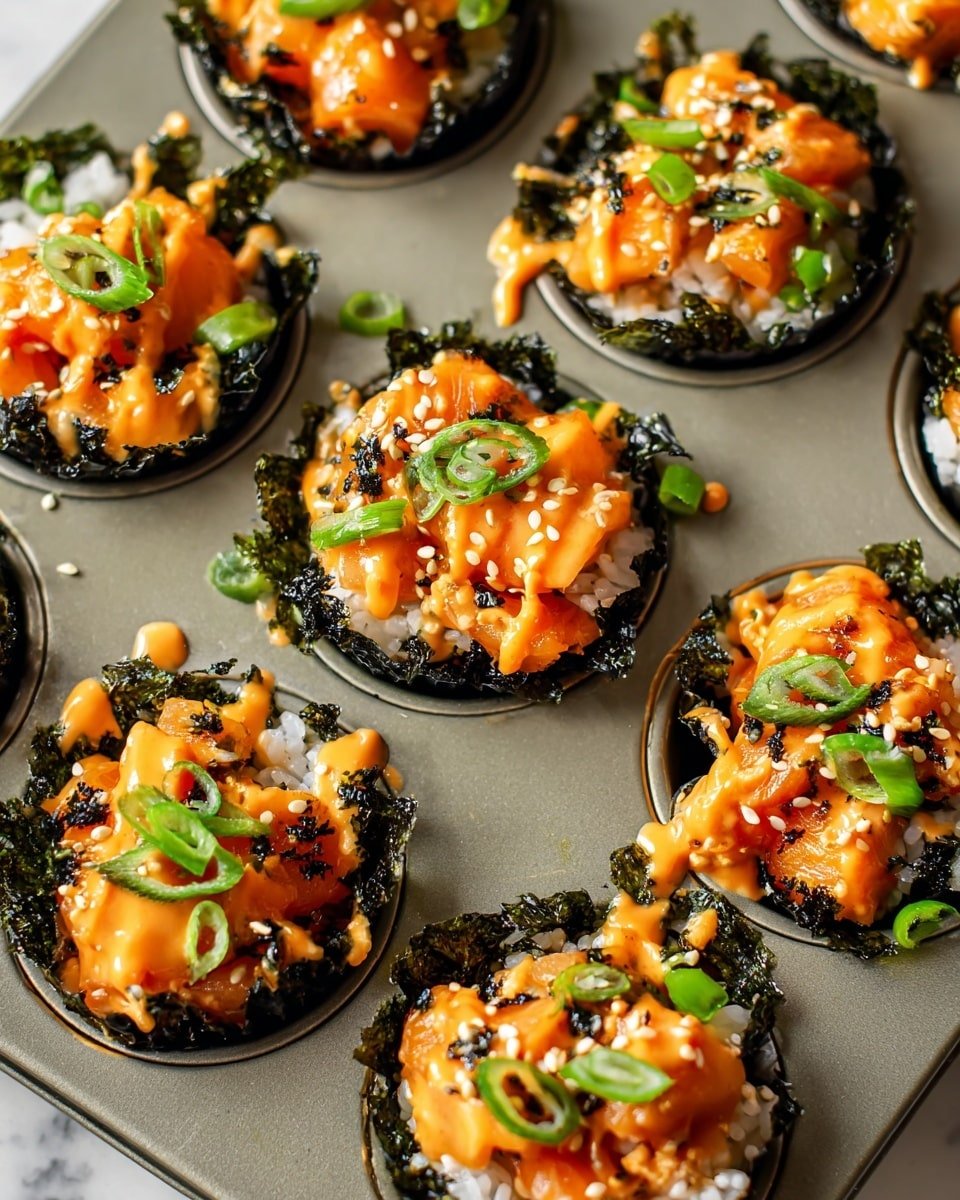
- Salmon (1 lb, cubed): Look for wild-caught if possible, for vibrant taste.
- Light Soy Sauce (1 tbsp): Brings subtle saltiness without overpowering.
- Kewpie Mayo (1 tbsp): Creamy and slightly sweet to balance spice.
- Sriracha (1 tbsp): Customize this to your heat preference.
- Sesame Oil (1 tsp): Adds that toasty fragrance you’ll adore.
- Sushi Rice (1 ½ cup uncooked): Short grain rice is key for stickiness and bite.
- Rice Vinegar (1 tbsp) & White Sugar (2 tsp): These create the perfect tangy-sweet sushi rice seasoning.
- Nori Sheets (3 large): Cut into squares to form your sushi cups.
- Furikake: A Japanese seasoning mix that adds color and crunch.
- Green Onion: Fresh garnish to brighten each bite.
- Cooking Spray: Prevents sticking and keeps cups crispy.
Smart Shopping Ideas
For the freshest salmon, visit your local fishmonger early in the day—they’ll often have the best catch. If you can’t find Kewpie mayo, regular Japanese mayo or even a mix of mayonnaise with a splash of rice vinegar works well. Grab sushi rice from an Asian market or the international aisle for authentic texture. Lastly, nori sheets vary in thickness—thinner sheets work best for easy shaping without cracking!
Cook Easy Baked Salmon Sushi Cups Recipe Step by Step
I love how straightforward this Easy Baked Salmon Sushi Cups Recipe is — you’ll be amazed at how quickly you can pull it together. Each step brings out those tantalizing flavors and textures, building that bubbled, gently golden crisp you want on top. Here’s how to make magic happen in your kitchen.- Cook the sushi rice: Follow the package instructions for cooking the rice perfectly. It should be sticky but tender—ideal for shaping your sushi cups.
- Prepare the seasoned rice: In a microwave-safe bowl, combine rice vinegar and sugar, heating just until the sugar dissolves. Pour this bright, tangy mixture over your warm rice and mix gently but thoroughly. Set aside while you move on.
- Mix the salmon topping: In a bowl, toss cubed salmon with light soy sauce, Kewpie mayo, sriracha, and sesame oil. The creamy-spicy coating will clothe each morsel beautifully.
- Cut the nori sheets: Slice each sheet into 4 rectangles or squares, sized perfectly to fit your muffin tin cups. This forms the crispy shell for your sushi.
- Assemble the cups: Lightly grease your muffin tin with cooking spray. Place each nori square in a cup, then add a spoonful of sushi rice onto the center. Press gently to mold the rice into a cup shape. Repeat until your tin is lined with these tasty bases.
- Layer on salmon mixture: Spoon the flavorful salmon mix over each rice cup, creating a colorful, savory top layer.
- Bake to perfection: Pop the entire muffin tin into a 400℉ oven and bake for about 15 minutes. You’ll notice the salmon cooks through and edges turn slightly golden crisp—so inviting!
- Finish and serve: Let the sushi cups cool a few minutes to firm up. Drizzle extra sriracha or spicy mayo, then garnish with furikake and chopped green onions for that perfect finishing touch. Serve immediately and enjoy every bite!
Serving the Dish with Flair
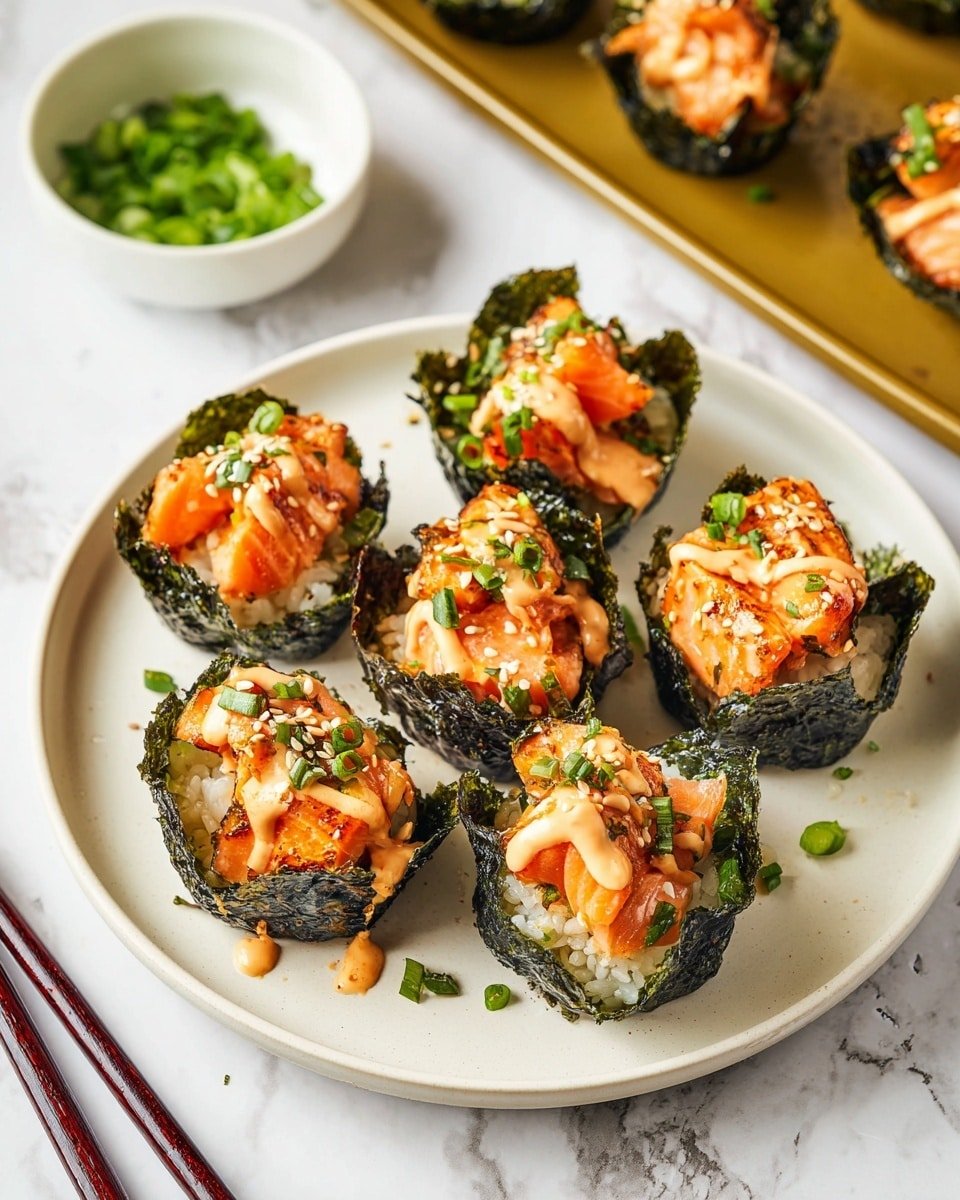
Serve It Up Right
- Perfect Pairings: Serve alongside a crisp cucumber salad or miso soup to balance warmth and freshness.
- Plating Magic: Present the sushi cups on a rustic wooden board with lemon wedges and small bowls of soy sauce or extra spicy mayo.
- Leftover Love: Store uneaten cups covered in the fridge up to 2 days; reheat gently in the oven to keep crisp edges.
- Occasion Twist: Add a splash of yuzu or swap salmon with cooked shrimp for festive holiday variations.
Fun Variations with Easy Baked Salmon Sushi Cups Recipe
- Swap out salmon for crispy tofu cubes to make a plant-based version that’s just as satisfying.
- Mix in diced avocado into the salmon topping for extra creaminess and a buttery texture.
- Add a sprinkle of toasted sesame seeds on top before baking for a nutty crunch.
- Drizzle unagi sauce or sweet soy glaze over finished cups for a rich, caramelized flavor.
- For a fusion twist, top with pickled ginger and a dash of wasabi mayo after baking.
- Toss in some finely chopped fresh cilantro or shiso leaves to brighten the flavor profile.
Make-Ahead & Storage Tips
- Refrigerate: Store baked sushi cups in an airtight container for 1-2 days for best freshness.
- Freezing: I recommend freezing only the salmon topping separately and assembling fresh sushi cups when ready to serve for optimal texture.
- Reheating: Warm in a 350℉ oven for 5-7 minutes to revive the crispy edges without drying out.
- Prep Ahead: Cook sushi rice and prep the salmon mixture ahead to save time on busy days.
Easy Baked Salmon Sushi Cups Recipe FAQs
- Can I use different fish? Absolutely! Try cooked shrimp or crab meat for tasty alternatives with the same sushi cup concept.
- Is it okay to use regular mayo instead of Kewpie? Yes, regular mayo works fine; adding a little rice vinegar can bring similar tanginess.
- How do I prevent the nori from getting soggy? Press the sushi rice firmly and bake immediately after assembling to keep nori crisp.
- Can I make these gluten-free? Use gluten-free tamari or soy sauce substitutes and check your other condiments for gluten content.
- What’s the best way to reheat leftovers? Gently warm in the oven rather than microwave to preserve texture and avoid sogginess.
Easy Baked Salmon Sushi Cups Recipe
These Easy Baked Salmon Sushi Cups are a fun and flavorful twist on traditional sushi, combining tender baked salmon with perfectly seasoned sushi rice and nori in convenient muffin tin servings. Ideal for a quick and impressive appetizer or light meal, they deliver a spicy, savory bite topped with furikake and green onions.
- Prep Time: 15 minutes
- Cook Time: 15 minutes
- Total Time: 30 minutes
- Yield: 12 cups
- Category: Appetizer
- Method: Baking
- Cuisine: Japanese
Ingredients
Salmon Mixture
- 1 lb salmon, cubed
- 1 tbsp light soy sauce
- 1 tbsp Kewpie Mayo
- 1 tbsp Sriracha
- 1 tsp sesame oil
Sushi Rice
- 1 ½ cups uncooked sushi rice
- 1 tablespoon rice vinegar
- 2 teaspoon white sugar
Assembly and Garnish
- 3 large nori sheets
- furikake, for garnish
- 1 green onion, chopped, for garnish
- cooking spray
Instructions
- Cook sushi rice: Prepare the sushi rice according to the package instructions until fully cooked and tender.
- Season the rice: In a microwave-safe bowl, combine rice vinegar and sugar. Microwave for about 30 seconds until the sugar dissolves completely. Pour this mixture evenly over the hot sushi rice and gently fold to combine. Set aside to cool slightly.
- Preheat oven: Set your oven to 400°F (200°C) to prepare for baking the salmon sushi cups.
- Prepare salmon mixture: In a medium bowl, mix the cubed salmon with light soy sauce, Kewpie mayo, Sriracha, and sesame oil until well combined. Set aside.
- Cut nori sheets: Slice each nori sheet into 4 rectangles or squares large enough to fit into the holes of a muffin tin.
- Assemble the sushi cups: Lightly grease the muffin tin with cooking spray. Place each nori square into a muffin cup, then add a spoonful of the seasoned sushi rice on top, pressing it gently to form a base. Layer spoonfuls of the salmon mixture evenly over the rice in each cup.
- Bake: Bake the assembled sushi cups in the preheated oven at 400°F for 15 minutes, until the salmon is cooked through and the tops begin to turn golden brown.
- Garnish and serve: Remove the sushi cups from the oven and allow to cool slightly. Drizzle additional Sriracha or spicy mayo if desired. Sprinkle with furikake and chopped green onions before serving immediately.
Notes
- Use fresh, sushi-grade salmon for best flavor and safety.
- Feel free to substitute Kewpie mayo with regular Japanese mayo or a spicy mayo blend.
- The sugar-vinegar seasoning can be adjusted to taste if you prefer sweeter or more tangy sushi rice.
- Make sure to press the rice firmly into the nori to help the sushi cups hold their shape after baking.
- These sushi cups are best enjoyed warm but can be served at room temperature.

