Welcome the Flavors of Hobnobs Cookies with Chocolate Coating Recipe
There’s something truly heartwarming about baking Hobnobs Cookies with Chocolate Coating Recipe. These biscuits evoke cozy afternoons, comforting nostalgia, and that wonderful texural contrast between bubbly oats and silky chocolate. I love how baking this recipe turns my kitchen into a fragrant haven filled with golden crisp aromas. Whether you’re looking for a delightful family treat or a casual weekend indulgence, these cookies bring the perfect blend of crunch and sweetness to your table.
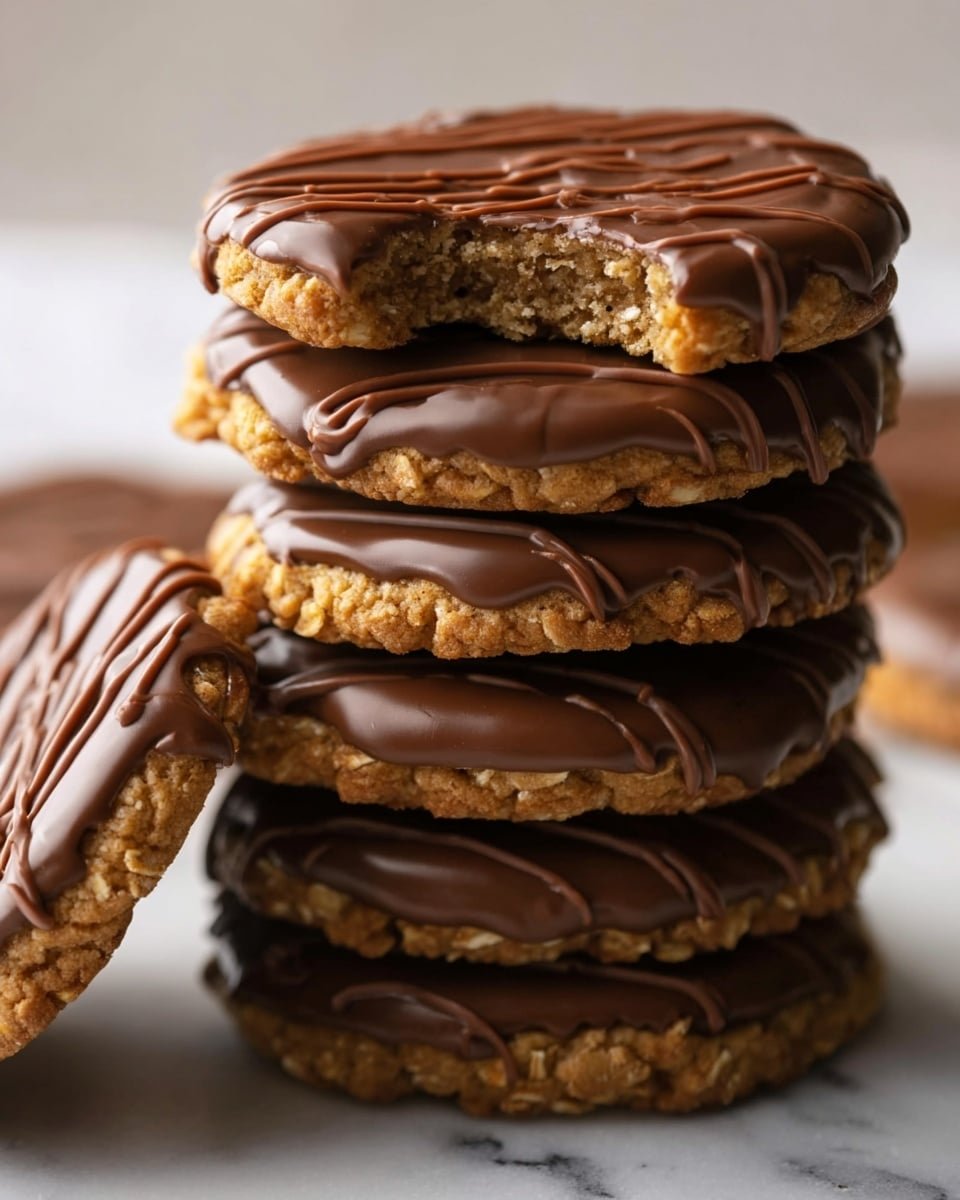
This recipe is a great one to try if you want a cookie that’s not too sweet but richly satisfying. The chocolate coating adds a luscious finish that’s hard to resist. You’ll enjoy sharing these with loved ones or even sneaking a few for yourself alongside a fresh cup of tea or coffee. Plus, it’s rewarding to create a homemade batch that looks as good as it tastes—with that classic Hobnobs charm!
Daisy’s Top Tips
- Flavor Builder: Toast the oats lightly before pulsing to deepen their nuttiness.
- Texture Magic: Don’t over-pulse the oats; short bursts keep a pleasant, chewy bite.
- Budget Friendly: Replace golden syrup with honey for a similarly sweet, sticky effect.
- Time Saver: Use pre-pulsed oats if you’re pressed for time—but nothing beats freshness!
Market Basket & Pantry Picks
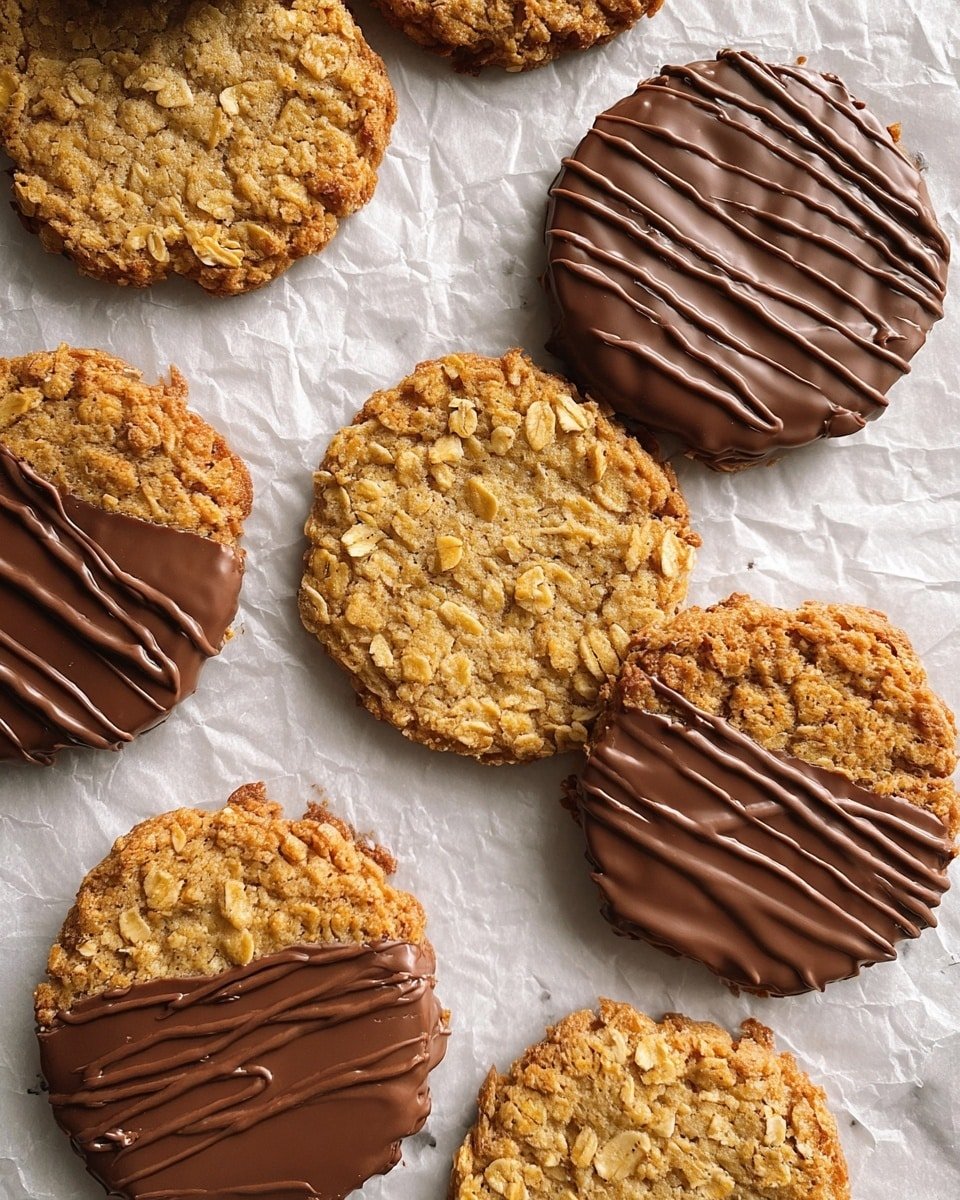
Choosing the right ingredients makes all the difference in this Hobnobs Cookies with Chocolate Coating Recipe. I highly recommend going for good-quality rolled oats and fresh butter—the richer and fresher, the tastier your cookies will be. Golden caster sugar helps create that pleasing crunchy sweetness, but feel free to swap in light brown sugar for a molasses hint. Using a flavor-packed vanilla extract brings everything together beautifully.
- Old-fashioned rolled oats: Provides the iconic chewy, bubbly texture. Use old-fashioned, not quick oats.
- Unsalted butter: Gives you control over salt levels and adds richness.
- Golden syrup: Classic for sticky sweetness. See notes for honey or corn syrup substitutes.
- Golden caster sugar: Fine texture that bakes to a delightful crunch.
- Pure vanilla extract: Essential for depth and warmth.
- All-purpose flour: Keeps the cookie tender with structure.
- Baking powder & baking soda: Help the cookies rise just enough.
- Salt & cinnamon: Salt balances sweetness; cinnamon is optional but adds cozy spice notes.
- Good-quality milk or dark chocolate: The luscious coating that transforms these Hobnobs into a special treat.
Smart Shopping Ideas
When picking oats, look for ones that are plump and dry—not dusty or stale. For butter, do check the sell-by date and pick unsalted for better flavor control. Golden syrup isn’t always easy to find; if needed, substitute with runny honey or light corn syrup—but honey will add a floral note. For chocolate coating, choose a bar you enjoy nibbling on—it makes all the difference once melted and spread.
Cook Hobnobs Cookies with Chocolate Coating Recipe Step by Step
This recipe is straightforward and super satisfying, perfect for a weekend afternoon project or an impromptu bake for the family. I’ll guide you through every step, so you get those bubbly oats and glossy chocolate just right.
- Preheat & Prep: Set your oven to 350°F (175°C) and line two large baking trays with parchment paper. This sets the stage for perfect baking—no sticking, easy cleanup.
- Pulse the oats: Pop your oats into a food processor and give them 3 quick pulses (each about one second). Don’t overdo it—you want bits that are broken up but still textured for that iconic Hobnobs chew.
- Melt butter & golden syrup: In a microwave-safe bowl (or double boiler), melt the butter and syrup together. Whisk until smooth and combined. Then stir in the golden caster sugar. Keep whisking until the mixture thickens and turns glossy—this bubbly blend is the flavor and texture backbone.
- Add vanilla: Stir in pure vanilla extract to infuse warmth and a rich aroma throughout your dough.
- Mix dry ingredients: Into the buttery mixture, add the pulsed oats, all-purpose flour, baking powder, baking soda, salt, and cinnamon (if you love that cozy hint). Stir until the batter comes together—it will feel gritty and dense, and that’s just right.
- Form cookie balls: Use a 1.5-tablespoon scoop to portion out the dough, packing it slightly as you go. Roll each portion firmly between your palms to form a neat round ball.
- Arrange & flatten: Place dough balls evenly spaced on your baking trays; gently flatten each one to your preferred thickness. This helps achieve that golden crisp edge we all adore.
- Bake to golden perfection: Bake for about 14 to 16 minutes, or until your hobnobs are a lovely golden brown. Every oven’s a little different, so peek near the end—watch for the bubbling edges and a crisp top.
- Cool completely: Let the cookies cool on trays for 20 minutes so they set up fully and won’t crumble when handled.
- Melt & coat chocolate: Gently melt your milk or dark chocolate—either in a microwave in short bursts or over a double boiler. Spread the melted chocolate evenly across the bottom of each cooled cookie for that irresistible finish.
- Set & enjoy: Allow the chocolate to harden at room temperature or in the fridge. Then dive in—your bubbly, golden crisp Hobnobs Cookies with Chocolate Coating Recipe is ready to delight!
Serving the Dish with Flair
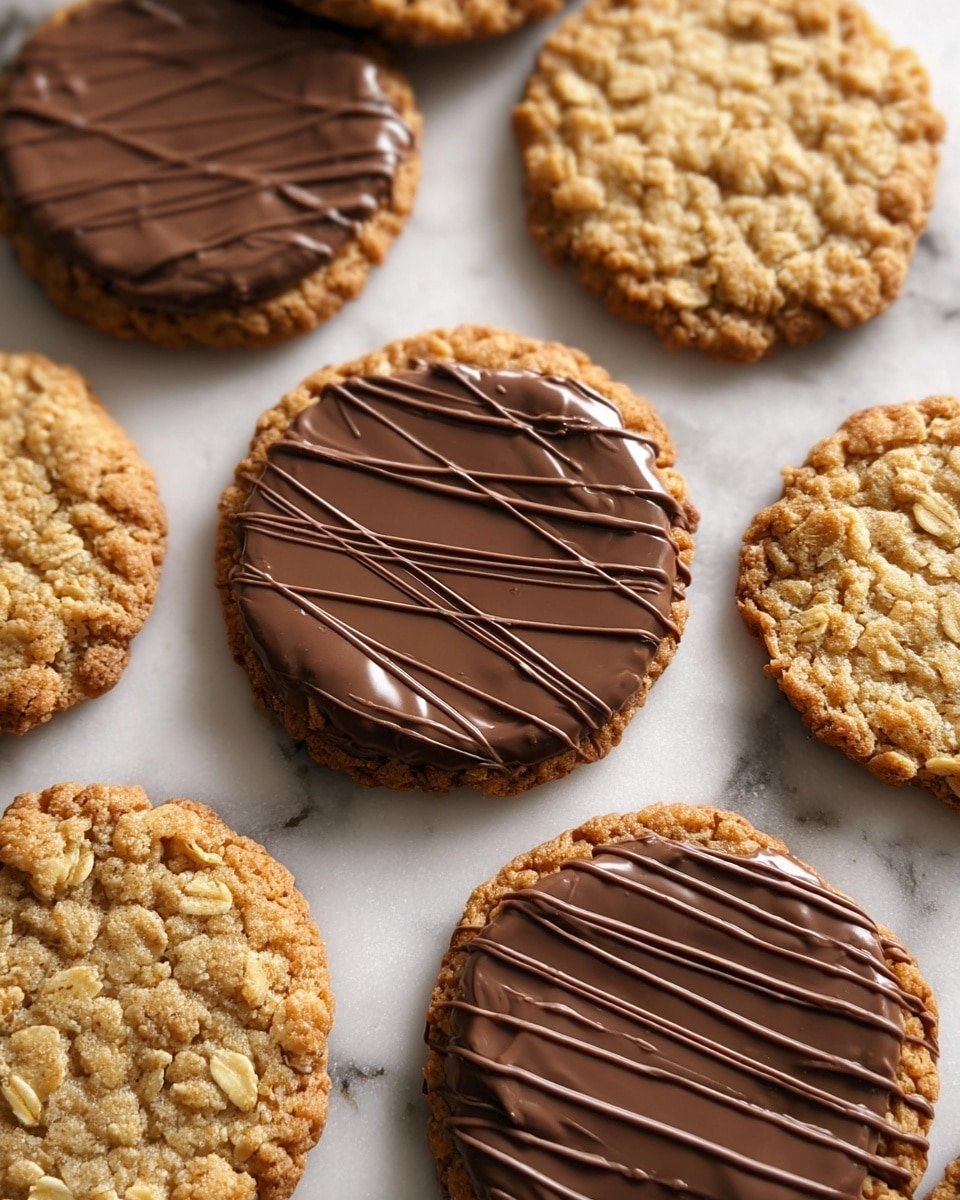
I always find that Hobnobs Cookies with Chocolate Coating Recipe shines when presented casually with a warm drink. You’ll enjoy serving them on a rustic wooden board or a cheerful patterned plate to highlight their golden bubbles and glossy chocolate sheen. Sharing these freshly baked delights brightens any coffee break, school lunchbox, or cozy family night in.
Serve It Up Right
- Perfect Pairings: A mug of steaming chai tea or creamy hot chocolate makes a dreamy match.
- Plating Magic: Arrange cookies with sprigs of fresh mint or a few edible flowers for a charming display.
- Leftover Love: Store cookies in an airtight container to keep them crisp and fresh for 4-5 days.
- Occasion Twist: Dress up for holidays by swirling white chocolate ribbons on top or sprinkling edible glitter!
Fun Variations with Hobnobs Cookies with Chocolate Coating Recipe
- Add a teaspoon of finely chopped crystallized ginger to the oat mixture for a zesty twist.
- Swap cinnamon for ground cardamom for exotic warmth.
- Mix in a handful of dried cranberries or raisins for bursts of chewy sweetness.
- Use dark chocolate and sprinkle with coarse sea salt for an irresistible sweet-savory combo.
- Top chocolate coating with crushed toasted pecans or hazelnuts for extra crunch and flavor.
- For nut lovers, swirl in a spoonful of crunchy peanut butter into the dough.
Make-Ahead & Storage Tips
- Refrigerate dough: You can make the dough up to 24 hours in advance; wrap tightly and keep chilled before scooping and baking.
- Freeze cookies: Baked cookies freeze beautifully in an airtight container for up to 3 months—just thaw at room temperature.
- Chocolate coating: If frozen, wait until cookies are thawed before melting and applying the chocolate layer for best texture.
- Reheat tips: Warm cookies in a low oven (300°F/150°C) for 5 minutes to revive that freshly baked warmth and slight crisp.
Hobnobs Cookies with Chocolate Coating Recipe FAQs
- Can I use quick oats instead of old-fashioned rolled oats? I recommend sticking with rolled oats for that chewy texture; quick oats tend to get mushy.
- What if I don’t have golden syrup? Honey or light corn syrup works as a substitute, though the flavor will shift slightly.
- How do I store leftover cookies? Keep them in an airtight container at room temperature up to 5 days, or freeze for longer storage.
- Can I use dark chocolate instead of milk chocolate? Absolutely! Dark chocolate adds a richer, less sweet layer that pairs beautifully with the oats.
- What’s the secret to glossy sugar mixture? Whisk well and gently warm the butter and syrup with sugar until it thickens slightly and becomes glossy—this step is key for texture and flavor.
Hobnobs Cookies with Chocolate Coating Recipe
Classic homemade Hobnobs cookies featuring a delightful combination of rolled oats, golden syrup, and golden caster sugar, baked to a perfect golden crisp and optionally finished with a rich chocolate coating. This recipe yields chewy yet crunchy biscuits with a hint of cinnamon and the option of milk or dark chocolate on the bottom for added indulgence.
- Prep Time: 25 minutes
- Cook Time: 15 minutes
- Total Time: 40 minutes
- Yield: Approximately 18 to 20 cookies
- Category: Cookie
- Method: Baking
- Cuisine: British
Ingredients
Dry Ingredients
- 125 grams old-fashioned rolled oats (about 1 1/4 cups)
- 125 grams all-purpose flour (about 1 cup)
- 1 1/2 teaspoons baking powder
- 1/2 teaspoon baking soda
- 1/4 teaspoon salt
- 1/4 teaspoon ground cinnamon (optional)
Wet Ingredients
- 125 grams unsalted butter (about 8 1/2 tablespoons)
- 20 grams golden syrup (about 1 tablespoon)
- 125 grams golden caster sugar (about 1/2 cup + 1 1/2 tablespoons)
- 1 teaspoon pure vanilla extract
Optional Topping
- 125 grams good-quality milk chocolate or dark chocolate (optional)
Instructions
- Preheat Oven and Prepare Trays: Preheat your oven to 350°F (175°C). Line two large baking trays with parchment paper to prevent sticking and ensure even baking.
- Pulse the Oats: Using a food processor, pulse the rolled oats three times for one second each to slightly break them down without over-processing, maintaining some texture.
- Melt Butter and Syrup: In a large microwave-safe bowl or using a double boiler, melt the unsalted butter together with the golden syrup, whisking well until combined.
- Add Sugar and Vanilla: Whisk in the golden caster sugar into the warm butter mixture until it becomes thick and glossy. If it doesn’t thicken, heat briefly but be careful not to overheat. Then whisk in the pure vanilla extract thoroughly.
- Combine Dry Ingredients: To the bowl with the butter mixture, add the pulsed oats, flour, baking powder, baking soda, salt, and cinnamon if using. Stir everything together until the dough forms a gritty, dense consistency, which is normal for Hobnobs dough.
- Shape the Cookies: Use a 1.5-tablespoon scoop to portion out the dough, compacting it slightly into the scoop. Roll each portion into a firm round ball using your hands, compacting the dough to form a smooth shape.
- Arrange and Flatten: Place the dough balls evenly spaced on the prepared baking trays. Slightly flatten each ball with your fingers or the back of a spoon to form cookie shapes.
- Bake: Bake the cookies in the preheated oven for 14 to 16 minutes until they turn a golden color to your liking.
- Cool the Cookies: Remove the trays from the oven and allow the cookies to cool completely on the trays for about 20 minutes.
- Apply Chocolate Coating (Optional): Once cool, melt the chocolate in a microwave or double boiler. Spread the melted chocolate evenly across the bottom of each cookie and allow it to set before serving.
Notes
- Golden syrup can be substituted with light corn syrup, honey, or maple syrup, although this may slightly alter the flavor and texture.
- For a gluten-free version, substitute the all-purpose flour with a gluten-free flour blend.
- Ensure not to over-process oats in the food processor to retain texture in the cookies.
- Using good-quality chocolate for the topping greatly enhances the flavor; dark chocolate adds a richer taste while milk chocolate adds creaminess.
- Store the cookies in an airtight container at room temperature for up to one week.

