Welcome the Flavors of Pumpkin Patch Dirt Cups Recipe
When autumn rolls in, there’s nothing quite like the cozy, spicy sweetness of pumpkin desserts to warm your heart—and that’s exactly why I adore this Pumpkin Patch Dirt Cups Recipe. It’s inspired by those fun childhood memories of playing outside in crunchy leaves, only now you can enjoy that whimsy in a glass. The creamy pumpkin pudding layered with rich chocolate, crunchy Oreos, and those playful gummy worms bring the perfect balance of flavors and textures.
If you’re looking for a festive treat that’s quick to whip up and great for family gatherings or Halloween parties, this recipe shines. I love how each spoonful bursts with pumpkin spice aroma and chocolatey goodness, making it an instant crowd-pleaser for kids and adults alike. Plus, it requires no baking—just simple layering and decorating, so you’ll have more time to relax and enjoy.
Daisy’s Top Tips
- Flavor Builder: Add a pinch of cinnamon or a splash of vanilla extract to the pumpkin pudding for extra depth.
- Texture Magic: For crunchier layers, toast the Oreos slightly before crushing—they add a lovely warm crisp.
- Budget Friendly: Use store-brand whipped topping and pudding mixes to keep costs down without sacrificing taste.
- Time Saver: Prep the pudding mixes simultaneously in two bowls for a faster assembly.
Market Basket & Pantry Picks
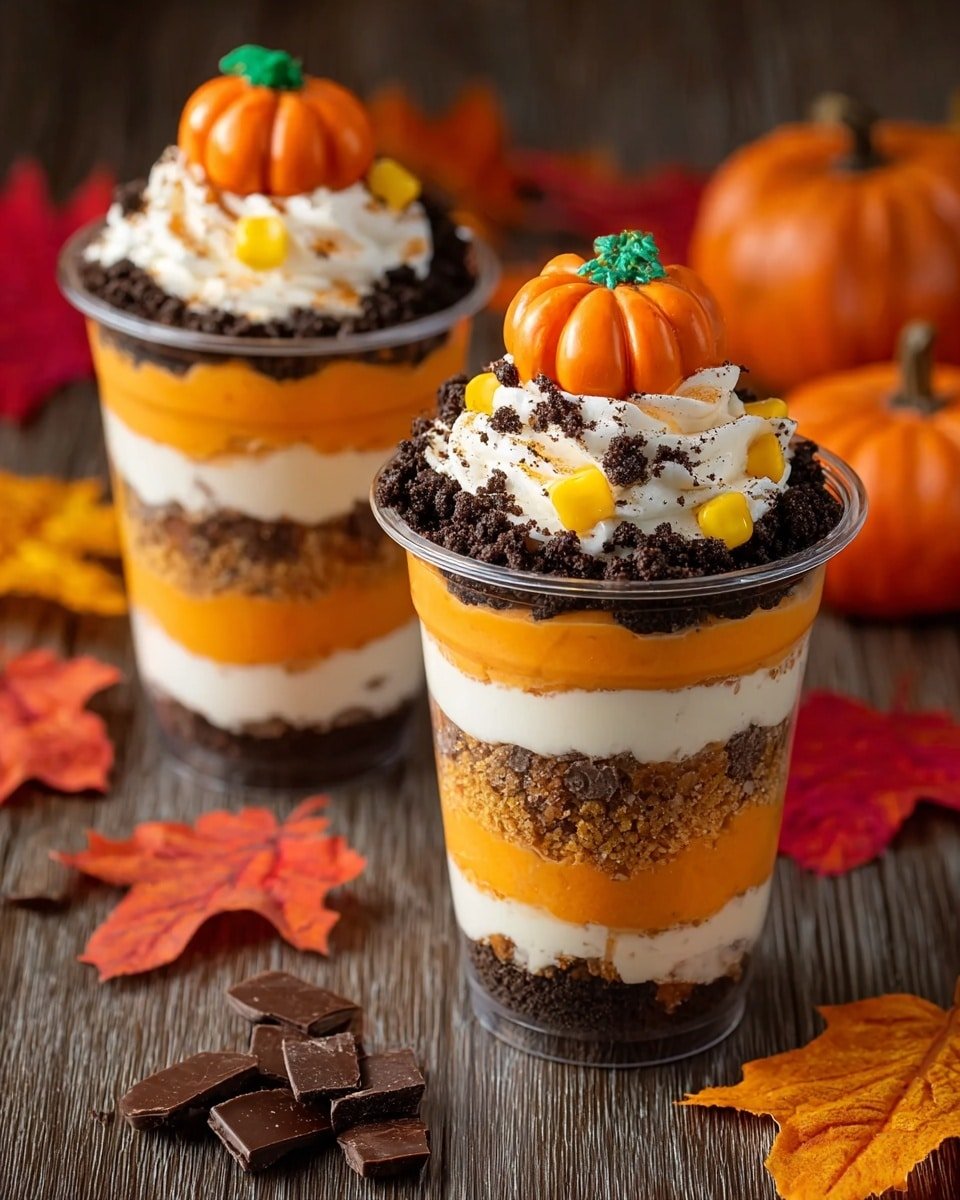
Choosing the right ingredients makes all the difference in the Pumpkin Patch Dirt Cups Recipe. For fresh and vibrant flavors, pick pumpkin puree that’s smooth and not overly watery. The pumpkin pie spice should be fragrant and balanced—too much can overpower the other flavors. If you can find a pumpkin spice instant vanilla pudding mix, that’s a treat, but the classic vanilla works just as well.
- Instant chocolate pudding mix: Provides the rich, chocolatey base layer with a silky texture.
- Instant vanilla pudding mix (or pumpkin spice): Gives that creamy pumpkin layer a mellow sweetness and seasonal flair.
- Canned pumpkin puree: Adds natural pumpkin flavor and thickens the vanilla pudding.
- Pumpkin pie spice: Blends cinnamon, nutmeg, and cloves for that signature autumn scent and taste.
- Milk: Required to whisk up the pudding; whole milk gives the best creaminess.
- Whipped topping: Lightens the pumpkin pudding, making each bite fluffy and cloud-like.
- Crushed Oreos: Mimic “dirt” and bring crunchy, chocolaty fun.
- Graham crackers (optional): Adds an extra layer of texture if you want variety.
- Gummy worms & candy pumpkins: For the whimsical, festive topping that everyone loves.
- Small clear plastic cups or glass jars: Perfect for displaying all those beautiful layers.
Smart Shopping Ideas
Look for pudding mixes near the baking aisle, and don’t hesitate to stock up during sales—these have a long shelf life. For pumpkin puree, grab a can labeled “100% pumpkin” rather than pumpkin pie filling to avoid extra sugars. If fresh pumpkin is in season and you’re up for a quick steam and puree, that works beautifully too. You can also swap Oreos with chocolate graham crackers for a slightly different crunch and flavor profile.
Cook Pumpkin Patch Dirt Cups Recipe Step by Step
This Pumpkin Patch Dirt Cups Recipe is so quick and delightful to make—you’ll enjoy the hands-on layering almost as much as eating them! Let’s get to the fun part, step by step, so you can impress your family effortlessly.
- Mix the Chocolate Pudding: Whisk the instant chocolate pudding mix with 2 cups of cold milk until thick and bubbly. Place it in the fridge for 5 to 10 minutes while you prepare the next mix. This helps it set perfectly.
- Prepare the Pumpkin Vanilla Layer: In a separate bowl, stir together the instant vanilla pudding mix and 2 cups of milk. Immediately add the canned pumpkin puree and pumpkin pie spice, stirring well until smooth and beautifully fragrant.
- Lighten It Up: Gently fold in the whipped topping into your pumpkin pudding mix, making it airy and soft—this is what makes the cups melt in your mouth!
- Build Your Cups: Spoon a generous layer of chilled chocolate pudding into the bottom of each clear plastic cup or jar. This base gives a rich chocolate foundation that’s so inviting.
- Dust with Crushed Oreos: Sprinkle a layer of crushed Oreos over the chocolate pudding, creating that signature “dirt” effect. This adds the perfect crunchy contrast.
- Add the Pumpkin Pudding: Carefully spoon the pumpkin pudding mixture over the Oreo layer, ensuring you don’t disturb the chocolate base.
- Finish with More Crumbs: Top your cups with more Oreos or graham cracker crumbs, covering the pumpkin pudding entirely. This seals the layers with a delightful texture.
- Decorate with Fun Toppers: Finally, arrange candy pumpkins and wiggle gummy worms on top. This playful garnish adds great character and sweetness to your creation.
Serving the Dish with Flair
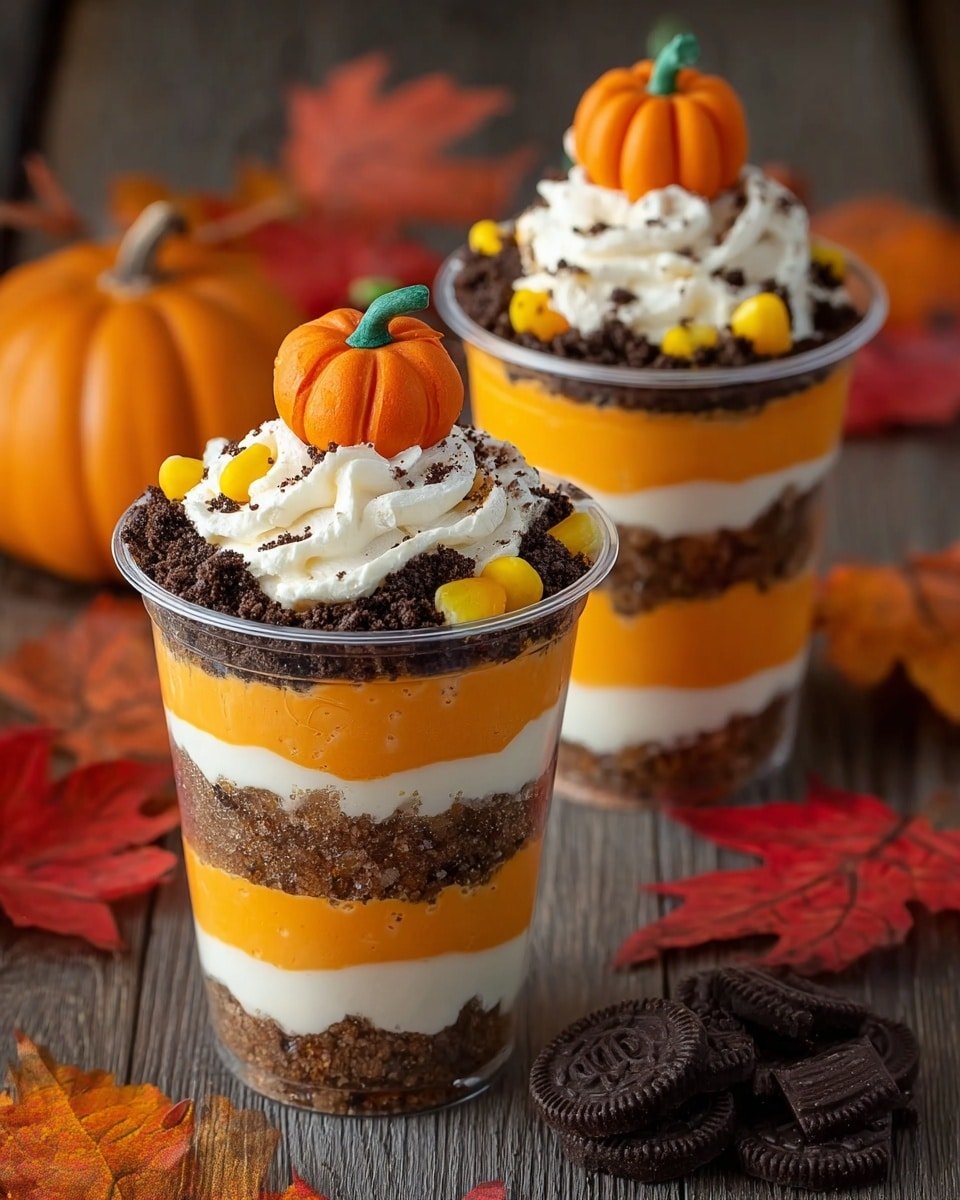
When it comes to serving your Pumpkin Patch Dirt Cups Recipe, presentation makes all the difference! I like to chill the cups an extra bit before serving so they’re cool and firm. Lining them up on a rustic wooden tray adds a charming fall vibe. Your guests will love how the layers peek through the clear cups—and those gummy worms bring smiles all around.
Serve It Up Right
- Perfect Pairings: Serve alongside spiced apple cider or a warm cup of chai tea for an autumnal spread.
- Plating Magic: Use layered mason jars or mini terracotta pots for a fun “pumpkin patch” display.
- Leftover Love: Cover and refrigerate for up to 3 days—just sprinkle fresh crumbs on top before serving to revive crunch.
- Occasion Twist: Customize colors and toppings for Halloween parties or Thanksgiving dessert tables.
Fun Variations with Pumpkin Patch Dirt Cups Recipe
- Swap the vanilla pudding for pumpkin spice pudding for an extra cinnamon kick.
- Mix mini chocolate chips into the pumpkin pudding for surprises of melty chocolate.
- Add a swirl of caramel sauce between layers for indulgent richness.
- Top with toasted pecans or walnuts to introduce a smoky crunch.
- Use crushed ginger snaps instead of Oreos for a spicy twist.
- Incorporate a dollop of cream cheese frosting in the pumpkin layer for tangy balance.
Make-Ahead & Storage Tips
- Refrigerate: Prepare the puddings and assemble your dirt cups up to 24 hours ahead, cover tightly and keep chilled for best texture.
- Freeze: Avoid freezing assembled cups as the pudding texture can change, but you can freeze leftover homemade whipped topping.
- Reheating: Enjoy these cups cold—no reheating needed, which makes them a perfect no-fuss dessert.
- Refreshing: Add fresh gummy worms and candy pumpkins just before serving if you’ve prepped early.
Pumpkin Patch Dirt Cups Recipe FAQs
- Can I use fresh pumpkin instead of canned? Absolutely! Just steam and puree fresh pumpkin until smooth. Use the same amount as canned puree for deliciously fresh flavor.
- What can I substitute for whipped topping? You can use homemade whipped cream or coconut whipped cream if you prefer dairy-free options.
- How long do these dirt cups stay good? They’re best enjoyed within 2-3 days when kept refrigerated to keep the layers fresh and texture perfect.
- Can I make this recipe gluten-free? Yes! Just substitute gluten-free chocolate sandwich cookies and graham crackers to keep the gluten free.
- Can kids help with this recipe? Definitely — scooping, layering, and decorating make it a fun activity for little helpers!
Pumpkin Patch Dirt Cups Recipe
These Pumpkin Patch Dirt Cups combine creamy chocolate and pumpkin-flavored puddings layered with crushed Oreos and decorated with fun fall-themed candies. This no-bake dessert is perfect for autumn gatherings, Halloween parties, or any time you want a festive and easy treat that captures the cozy flavors of pumpkin spice with a delightful dirt-and-worms theme.
- Prep Time: 20 minutes
- Cook Time: 0 minutes
- Total Time: 20 minutes
- Yield: 8 servings
- Category: Dessert
- Method: No-Cook
- Cuisine: American
- Diet: Vegetarian
Ingredients
Pudding Mixtures
- 1 box instant chocolate pudding mix
- 1 box instant vanilla pudding mix (or pumpkin spice flavor)
- 4 cups milk (2 cups per pudding box)
- 1/2 cup canned pumpkin puree
- 1 tsp pumpkin pie spice
- 1 cup whipped topping (Cool Whip or similar)
Toppings and Decorations
- Crushed Oreos
- Graham crackers (optional)
- Gummy worms
- Candy pumpkins
Serving
- Small clear plastic cups or glass jars
Instructions
- Prepare Chocolate Pudding: Mix the instant chocolate pudding mix with 2 cups of milk in a bowl. Chill for 5–10 minutes until set.
- Prepare Pumpkin Pudding: In a separate bowl, mix the instant vanilla pudding mix with 2 cups of milk. Stir in the canned pumpkin puree and pumpkin pie spice until the mixture is smooth and uniform in color.
- Fold in Whipped Topping: Gently fold the whipped topping into the pumpkin pudding mixture to create a lighter, creamier texture.
- Assemble Dirt Cups – Bottom Layer: Spoon a layer of chocolate pudding into the bottom of each clear cup or jar.
- Add Oreo Crumbs: Sprinkle a layer of crushed Oreos over the chocolate pudding to create the ‘dirt’ layer.
- Pumpkin Pudding Layer: Spoon the pumpkin pudding mixture on top of the Oreo crumbs in each cup.
- Top Layer – Dirt Finish: Cover the pumpkin pudding layer completely with more crushed Oreos or crushed graham crackers for a dirt-like appearance.
- Decorate: Place candy pumpkins, gummy worms, and any other desired sprinkles on top for a festive pumpkin patch look.
Notes
- You can substitute the vanilla pudding mix with a pumpkin spice pudding mix for a stronger pumpkin flavor.
- For a dairy-free version, use dairy-free milk and whipped topping alternatives.
- Prepare the pudding mixtures ahead of time and assemble just before serving for best texture.
- Optional graham crackers add a slightly different texture compared to Oreos – choose based on preference.
- These cups make great party favors and kid-friendly treats.

