Welcome the Flavors of Red Velvet Cheesecake Bites Recipe
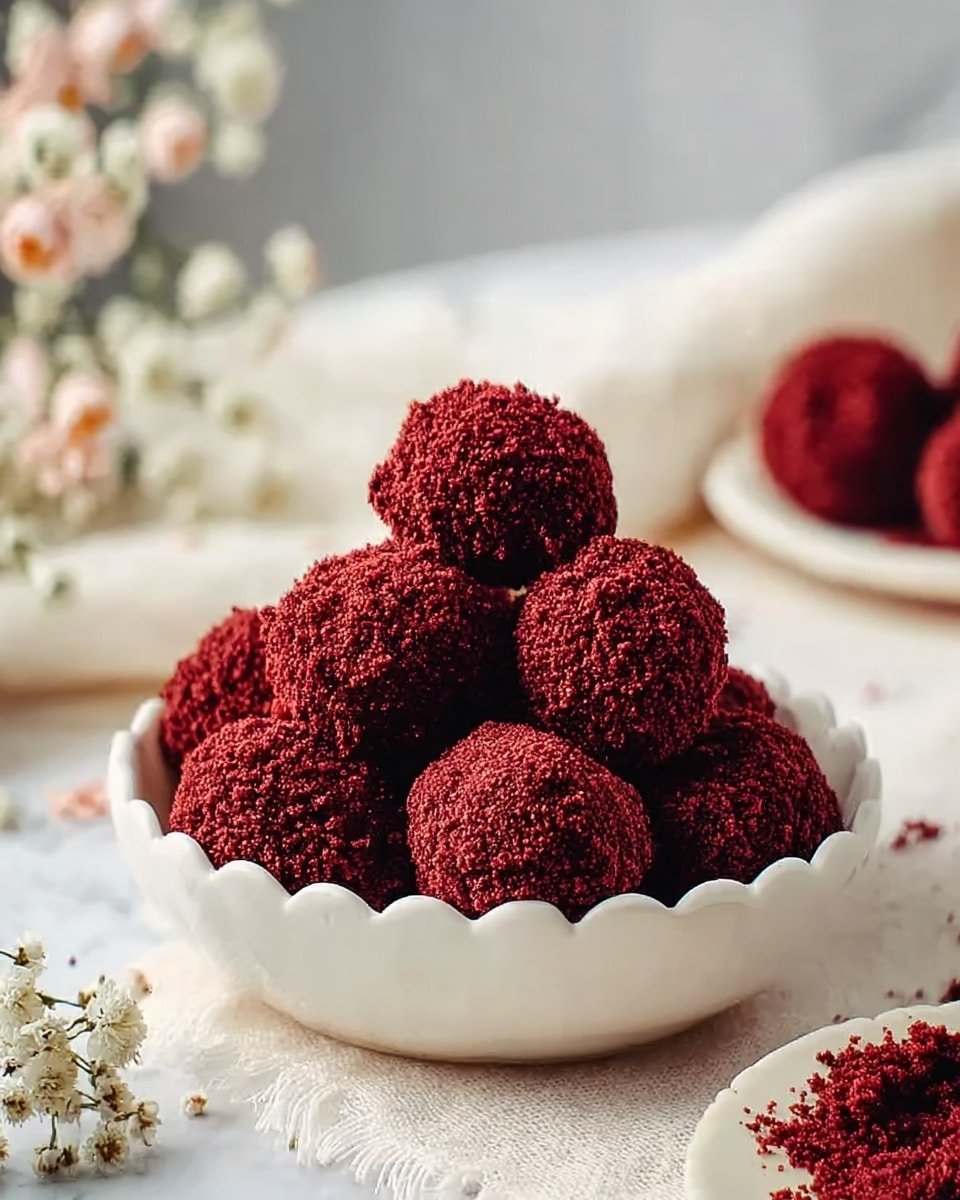
If you’re craving a sweet treat that’s both adorable and utterly delicious, this Red Velvet Cheesecake Bites Recipe is your new go-to. I love how these bite-sized gems combine the deep, chocolatey tang of red velvet cake with the creamy richness of cheesecake filling. Perfect for family gatherings, quick dessert fixes, or even a festive party platter, these bites bring a bubbly pop of flavor that everyone will enjoy.
What’s great about this recipe is how straightforward it is—no need to fuss over complicated steps. You’ll enjoy creating these fragrant morsels that balance silky cream cheese with that signature red velvet crumb. Plus, they’re perfect for making ahead and sharing throughout the week.
Daisy’s Top Tips
- Flavor Builder: Add a hint of cinnamon or a dash of espresso powder to the red velvet crumbs for extra warmth.
- Texture Magic: Make sure your cream cheese and butter are softened well to get that light, fluffy filling.
- Budget Friendly: Using boxed cake mix saves time and money without sacrificing flavor.
- Time Saver: Bake the red velvet cake a day ahead to let it cool properly, making crumbling a breeze.
Market Basket & Pantry Picks
Choosing the right ingredients makes all the difference in your Red Velvet Cheesecake Bites Recipe. While the boxed cake mix keeps things simple, I recommend using full-fat cream cheese and fresh butter—you’ll taste the richness instantly. For the graham crackers, go for crunchy varieties for that perfect crumb texture. If you prefer, you can swap graham crackers for digestive biscuits or even vanilla wafers as a tasty alternative.
- Red velvet cake mix: Follow the package for the freshest outcome.
- Cream cheese: Softened to a creamy consistency—don’t skip this step!
- Butter: Unsalted and softened, to keep the filling silky smooth.
- Powdered sugar: Adds sweetness without graininess.
- Graham crackers: Finely crushed, they add a delightful crunch.
- Vanilla extract: A splash amplifies the filling’s flavor beautifully.
Smart Shopping Ideas
Always check the expiration dates on dairy products to keep your cheesecake filling smooth and tasty. For the red velvet cake, if you want a more natural touch, opt for a cake mix free of artificial colors or make your own from scratch. Graham crackers should be firm; avoid any that feel stale. Also, buying vanilla extract in bottles rather than sprays ensures better flavor impact.
Cook Red Velvet Cheesecake Bites Recipe Step by Step
This recipe is fun and straightforward, perfect for when you want a dessert that feels impressive without hours in the kitchen. Follow along, and you’ll have those glossy, red velvet cheesecake bites in no time!
- Preheat and Prep: Fire up your oven to 350°F and grease or line two 8-inch cake pans with parchment. This step sets you up for baking an even cake with minimal cleanup.
- Bake the Red Velvet Cake: Follow your cake mix directions exactly—measure carefully! Once baked, cool the cake completely; this ensures your crumbs won’t turn into a mushy mess.
- Create the Red Velvet Crumbs: Crumble the cooled cake by hand until it looks like coarse sand. If it’s too moist to roll in, pop the crumbs on a lined baking sheet and dry them in the oven for 5-6 minutes. The dry crumbs give your bites a golden crisp outer texture.
- Mix the Cream Cheese Filling: In a large bowl, blend softened cream cheese, butter, and powdered sugar with a mixer until the mixture feels light and fluffy. This makes the filling decadently creamy and easy to scoop.
- Add Crunch and Flavor: Crush the graham crackers finely using a rolling pin in a zip-top bag. Stir these crumbs along with the vanilla extract into your cream cheese mixture until everything is beautifully combined.
- Scoop and Chill: Use a 2-teaspoon cookie scoop to portion the cream cheese mixture. Roll each into a smooth ball and arrange on a lined tray. Pop them in the fridge for an hour to firm up—this step is key for handling later.
- Coat with Red Velvet Crumbs: After chilling, roll each cheesecake ball generously in your red velvet cake crumbs, covering all sides. Use your hands to shape them into perfect little bites—a fun part that makes you feel like a dessert artist.
- Enjoy or Store: Dive in right away for that fresh, tangy bite or keep them refrigerated until your next sweet craving hits.
Serving the Dish with Flair

These Red Velvet Cheesecake Bites are as charming on a plate as they are delicious. Arrange them on a pretty platter with fresh berries or a sprinkle of powdered sugar for a simple, elegant touch. They make lively conversation starters at any get-together or a delightful indulgence after a family meal.
Serve It Up Right
- Perfect Pairings: Serve with a cup of robust coffee or rich hot chocolate for a dreamy combo.
- Plating Magic: Present on a tiered dessert stand or sprinkle edible gold dust for fancy occasions.
- Leftover Love: Store leftovers covered in the fridge for up to 3 days to keep them fresh and creamy.
- Occasion Twist: Add crushed peppermint candy or toasted nuts to the crumbs for holiday flair.
Fun Variations with Red Velvet Cheesecake Bites Recipe
- Swirl some raspberry jam into the cream cheese filling for a fruity surprise in each bite.
- Mix in mini chocolate chips into the cream cheese for extra texture and chocolaty bursts.
- Roll the bites in toasted coconut flakes instead of cake crumbs for a tropical twist.
- Add a pinch of cayenne pepper to the crumbs for a hint of warmth and spice.
- Dip the finished bites halfway in melted white or dark chocolate for a glossy finish.
- Top each bite with a tiny edible flower or fresh mint leaf to impress guests visually.
Make-Ahead & Storage Tips
- Refrigerate: Store cheesecake bites in an airtight container for up to 3 days; they taste best chilled.
- Freeze: Freeze uncoated cream cheese balls on a tray, then transfer to a freezer bag. Thaw entirely before rolling in crumbs.
- Reheat: These bites are best served cold or at room temperature; avoid microwaving as the cream cheese texture changes.
- Prep in Advance: Bake the red velvet cake and prepare crumbs a day ahead to save active time on assembly day.
Red Velvet Cheesecake Bites Recipe FAQs
- Can I use homemade red velvet cake instead of a cake mix? Absolutely! Homemade cake works beautifully, just make sure it’s fully cooled before crumbling.
- What if my cream cheese filling is too soft to roll? Chill the filling in the refrigerator for 15-20 minutes or until firm enough to handle comfortably.
- Can these bites be made vegan or dairy-free? You can try dairy-free cream cheese and butter substitutes, but texture and flavor might differ slightly.
- How long can I keep the cheesecake bites in the fridge? They’re best within 3 days, but always store them in an airtight container for freshness.
- Is it necessary to chill the bites before coating? Yes—chilling firms them up so they hold their shape when rolled in crumbs.
Red Velvet Cheesecake Bites Recipe
These Red Velvet Cheesecake Bites combine the rich, moist flavor of red velvet cake with a creamy, tangy cheesiness in bite-sized treats. Featuring a crunchy graham cracker and vanilla cream cheese filling and a crumbly red velvet coating, these no-bake cheesecake balls make for a delightful, elegant dessert perfect for parties or sweet cravings.
- Prep Time: 15 minutes
- Cook Time: 30 minutes (baking the cake)
- Total Time: 1 hour 45 minutes (including chilling and drying time)
- Yield: About 24 bites
- Category: Dessert
- Method: Baking
- Cuisine: American
Ingredients
Red Velvet Crumb
- 1 box red velvet cake mix
- Ingredients as directed on cake mix package (usually oil, eggs, water)
Cream Cheese Filling
- 16 ounces cream cheese, softened
- 4 tablespoons butter, softened
- 1/2 cup powdered sugar
- 2 cups graham crackers, finely crushed
- 1 teaspoon vanilla extract
Instructions
- Prepare Red Velvet Cake: Preheat your oven to 350°F and grease or line two 8-inch cake pans with parchment paper. Follow the package directions for the red velvet cake mix to prepare the batter and bake the cakes. Once baked, allow the cakes to cool completely.
- Make Cake Crumbs: Crumble the cooled cake by hand until it resembles coarse sand. If the cake is too moist, break it into chunks and spread on a lined baking sheet. Dry in the oven at 350°F for 5-6 minutes to reduce moisture.
- Prepare Cream Cheese Mixture: In a large bowl, combine softened cream cheese, butter, and powdered sugar. Using an electric hand mixer, blend until the mixture is light and fluffy.
- Add Graham Crackers and Vanilla: Crush graham crackers finely in a zip-top bag with a rolling pin. Add the crushed graham crackers and vanilla extract to the cream cheese mixture, mixing until fully incorporated.
- Form Cheesecake Balls: Using a 2-teaspoon cookie scoop, scoop out portions of the cream cheese mixture. Roll each into a smooth, round ball by hand and place on a lined baking sheet or large plate. Refrigerate for 1 hour to firm up.
- Coat with Red Velvet Crumbs: After chilling, roll each cream cheese ball in the red velvet cake crumbs, coating evenly on all sides. Reshape into round bites as needed.
- Serve or Store: Enjoy the cheesecake bites immediately or refrigerate until ready to serve.
Notes
- For best results, ensure the red velvet cake is completely cool before crumbling.
- If the crumbs are too moist, drying them in the oven helps prevent sogginess when coating the cheesecake balls.
- These bites can be stored in an airtight container in the refrigerator for up to 3 days.
- You can substitute store-bought red velvet cake or leftover cake for convenience.
- Use full-fat cream cheese and butter for the creamiest texture.
- Powdered sugar helps keep the filling smooth, but you can adjust sweetness to taste.

